No products in the cart.
Account
Login
Register
Your shopping cart
Selecting and Configuring Your Sprinter's Roof Rack
Maximizing your Sprinter’s potential with a modular roof rack system that adapts to your gear, adventures, and lifestyle.
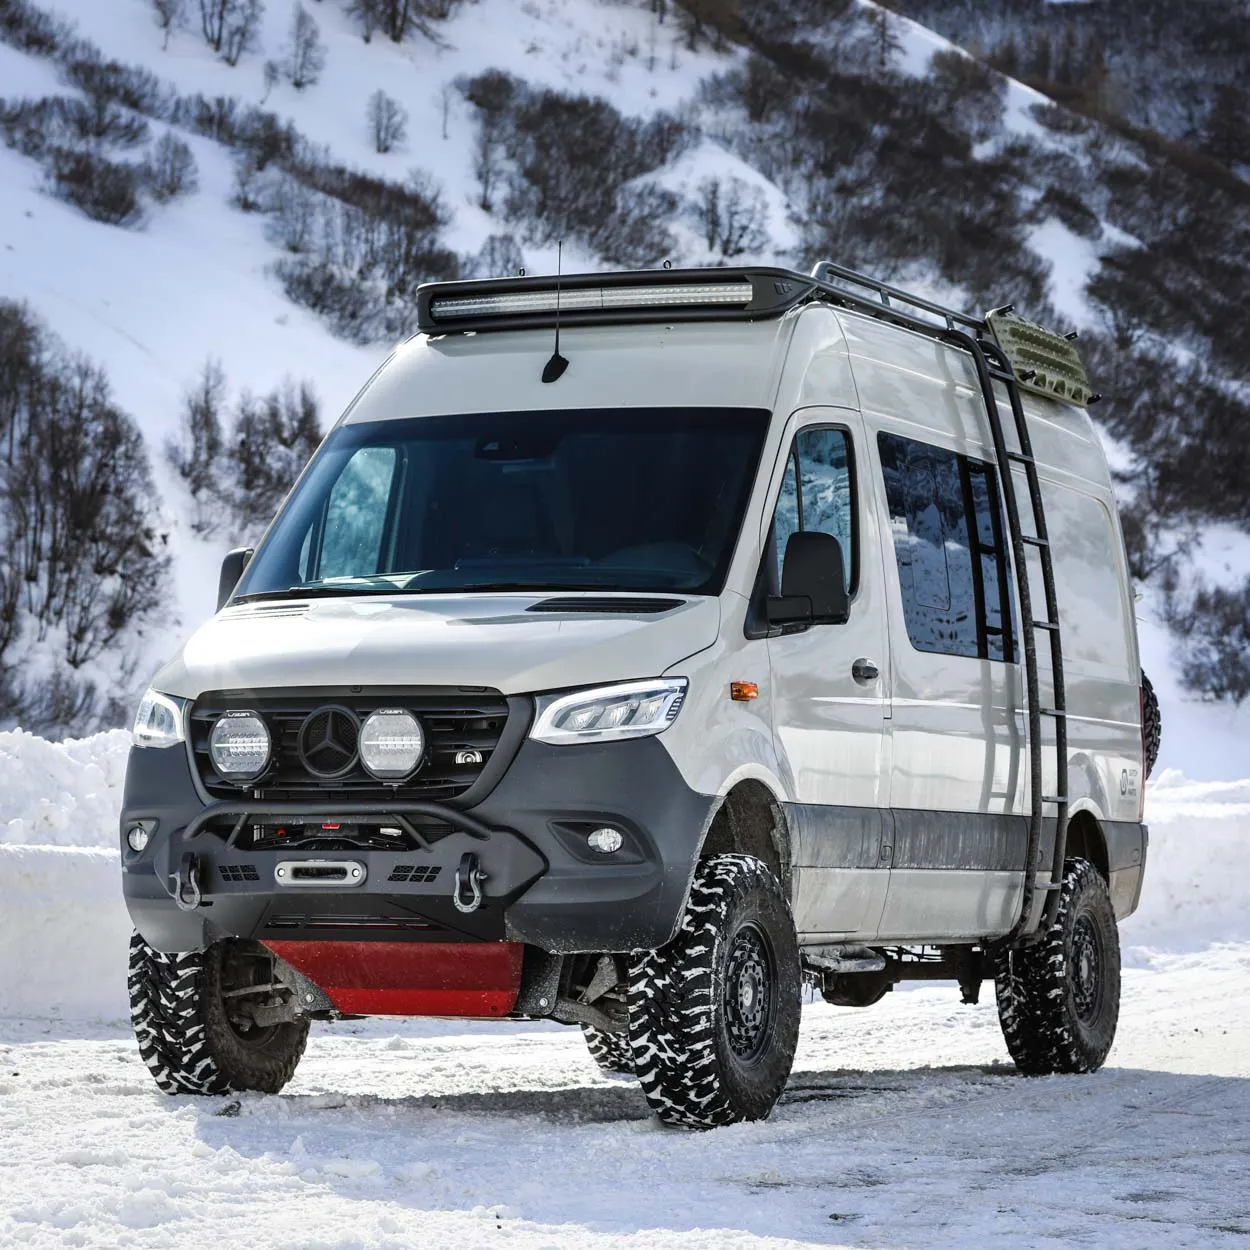
Our Roof Rack Models
Selecting Your Roof Rack
When selecting a roof rack for your Sprinter, there are several important options to consider. In this guide, we walk you through those choices and explain how our roof rack ecosystem works, helping you configure a setup that perfectly matches your needs.
Before diving in, here are a few key things to know about all our Sprinter roof racks:
Designed exclusively for H2 Sprinter models
Available in L2, L3, and L4 lengths
The Basecamp, Camp 2, and Camp 3 roof racks form one unified ecosystem
- The Roof Racks come with there own Roof Rail and it’s recommended to remove the OEM rail
For Hymer campers with a pop-top, we offer dedicated models:
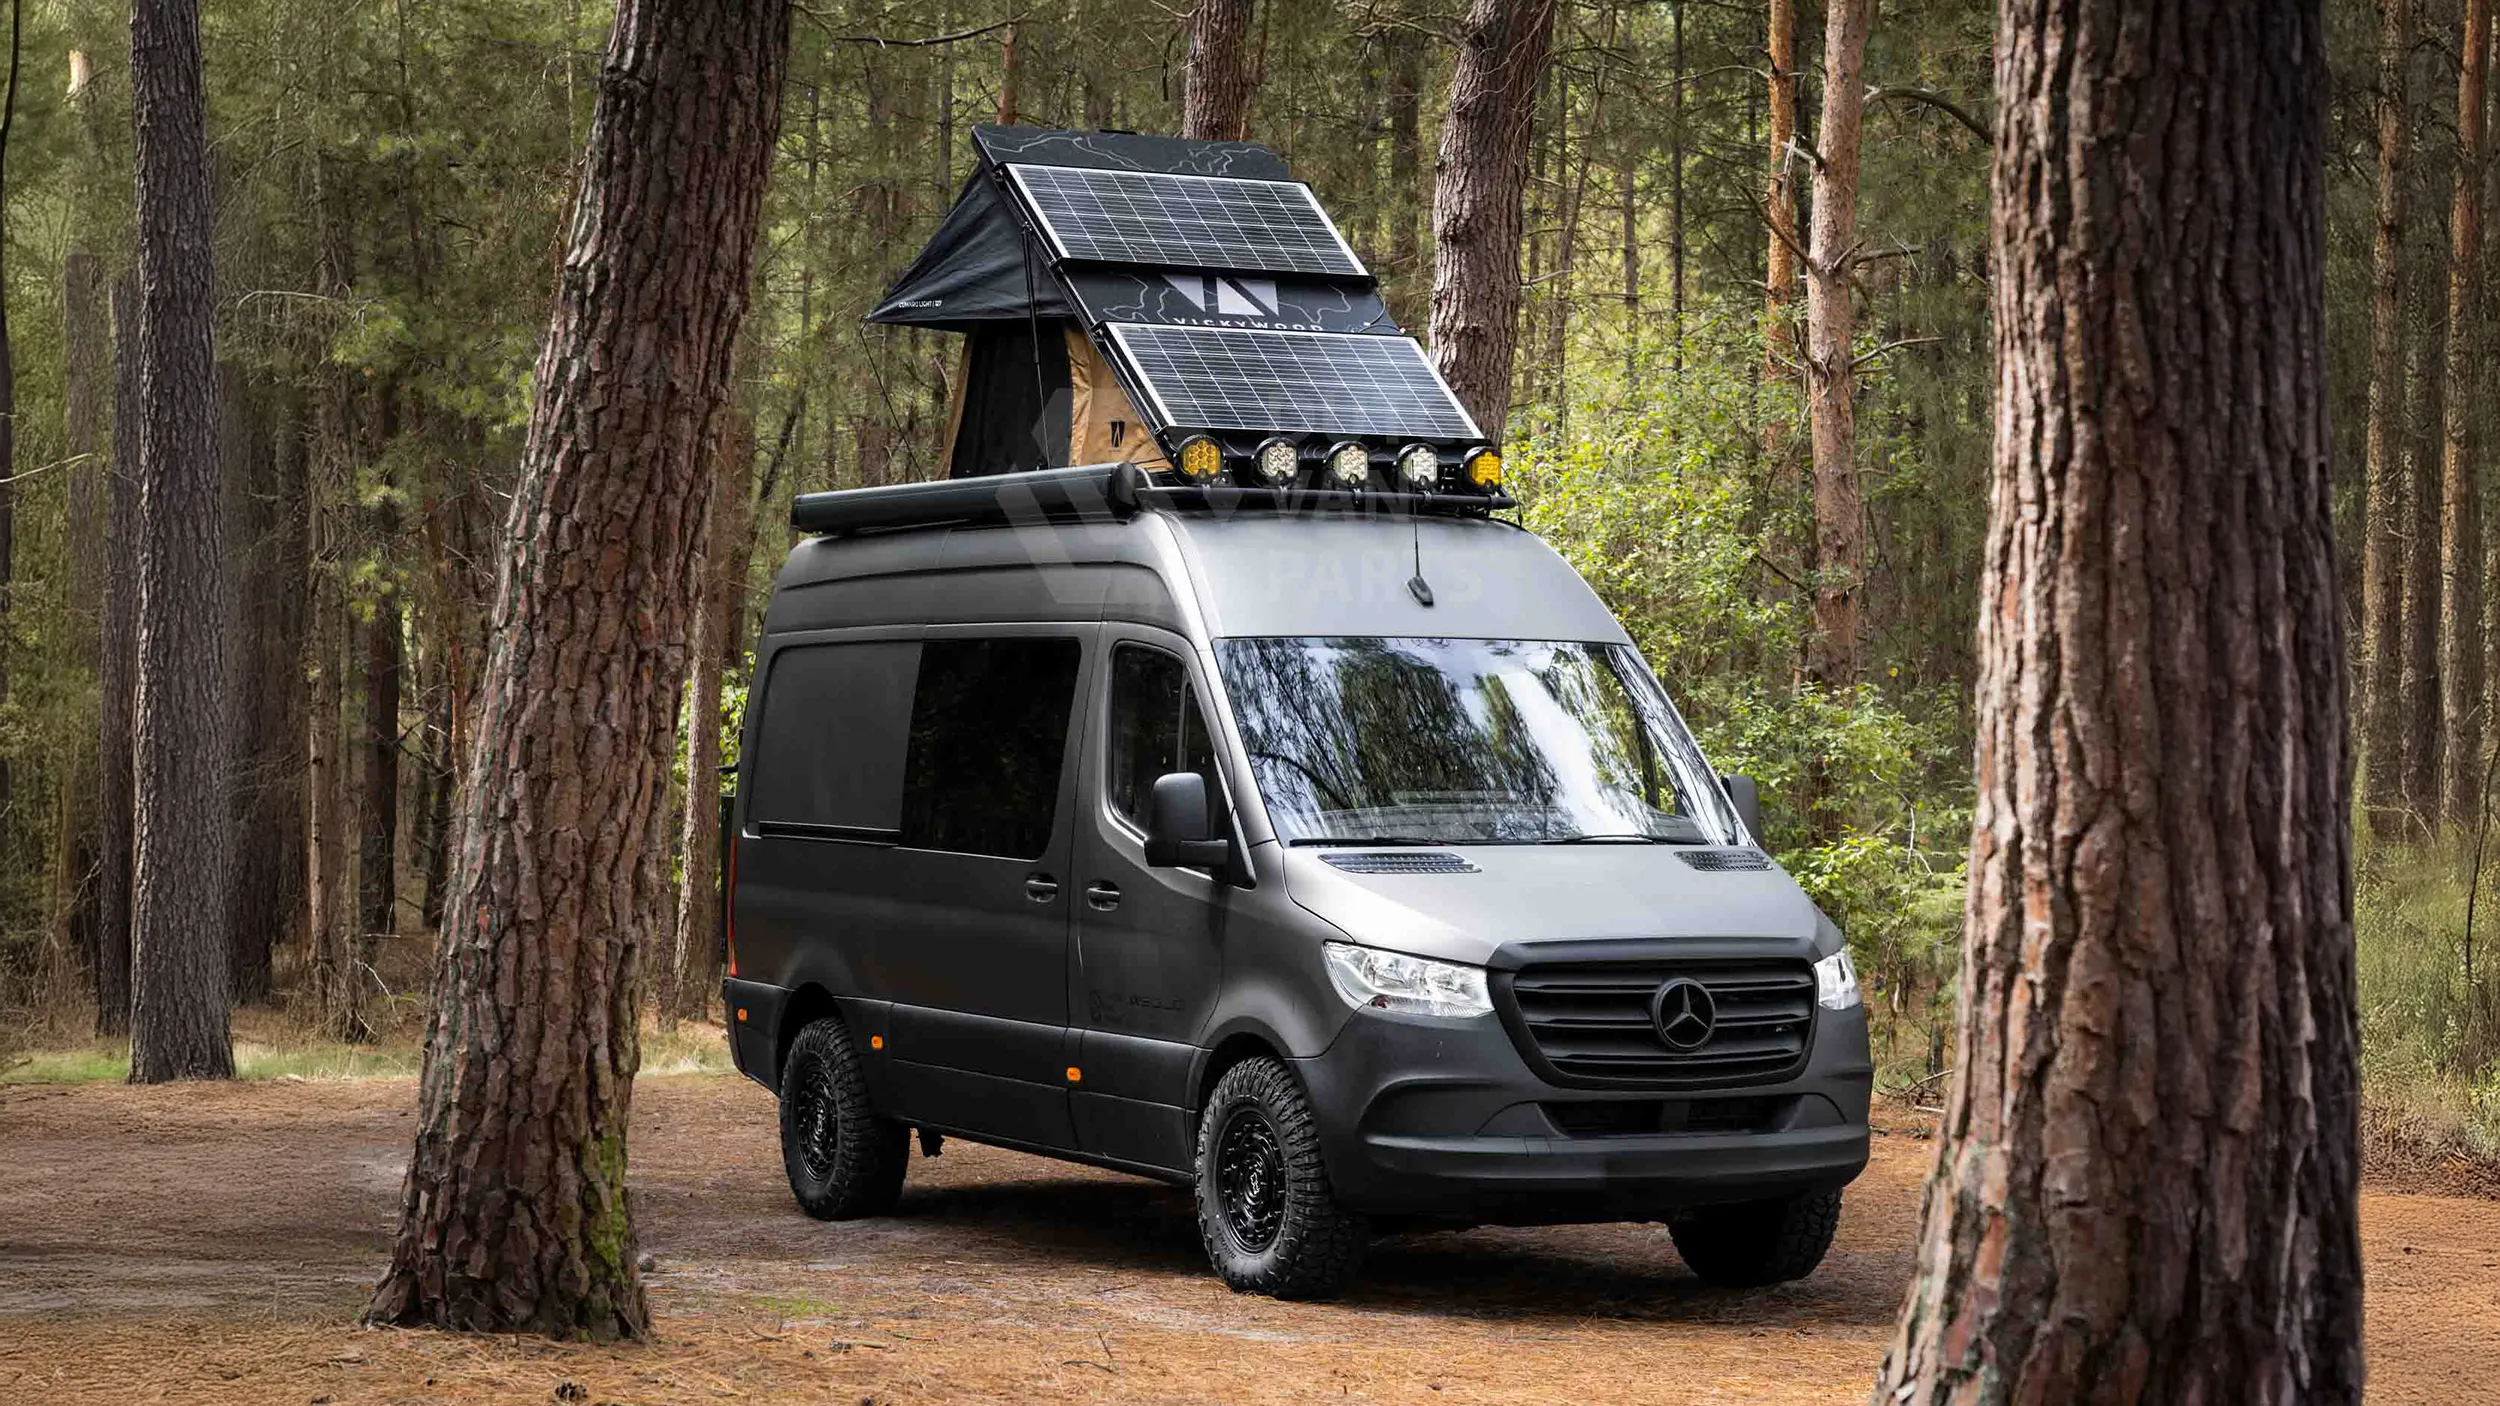
The Basecamp Roof Rack
The Basecamp Roof Rack is a lightweight, modular solution for H2 Sprinters, with a single front tube that can hold a LED bar or lamps to prevent front-end vibrations. The fully modular floor decking system allows for solar panels, vents, or other setups, and installation is simple with bolt-on OEM rails requiring no drilling. Ideal for users seeking a budget-friendly, flexible roof rack for minimal or customized setups.
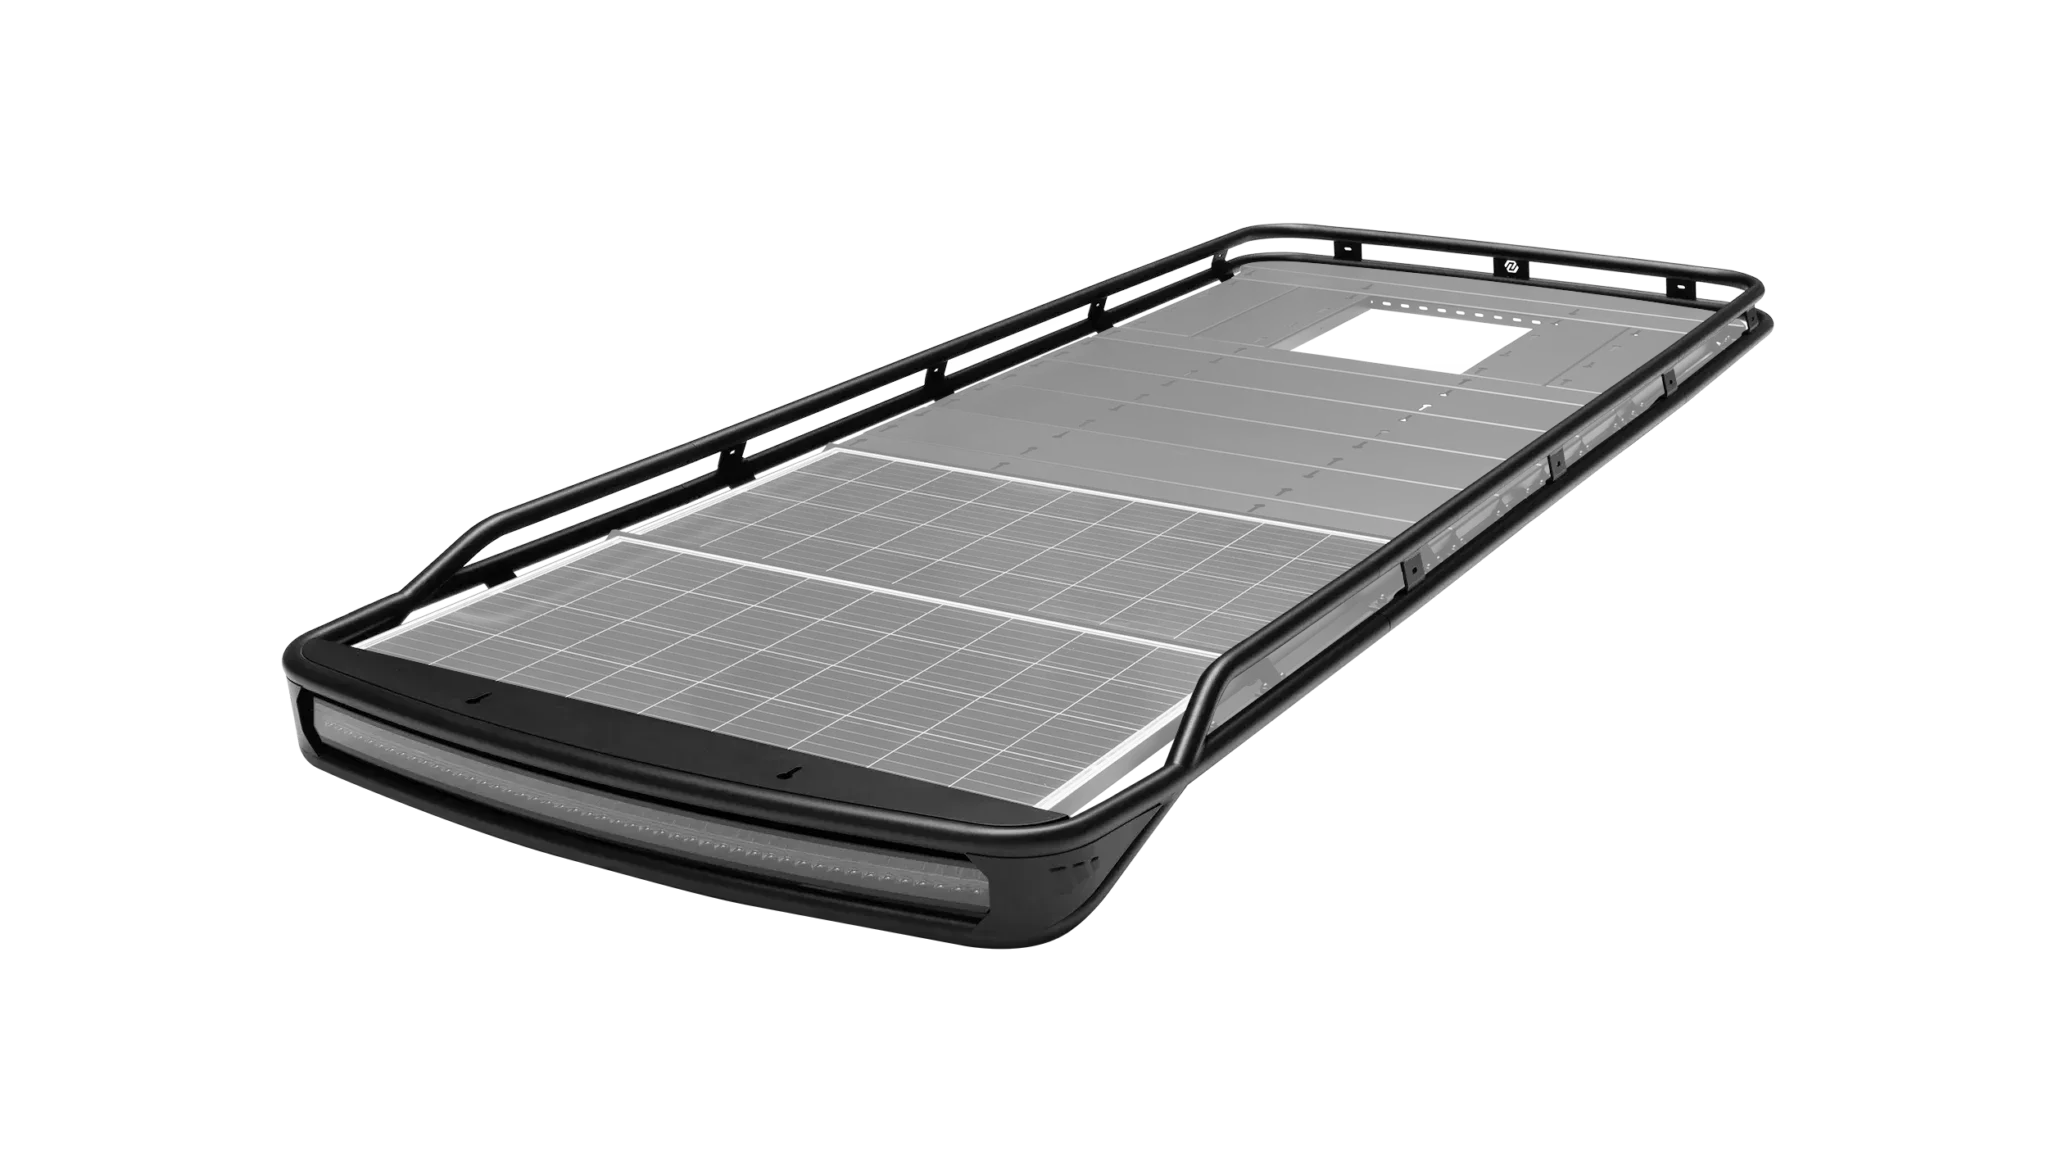
The Camp 2 Roof Rack
The Camp 2 Roof Rack is a sturdy, modular system designed to perfectly follow the curves of your H2 Sprinter, featuring a front section built to hold a 50-inch double-row LED bar. With a fully modular floor decking system, it allows you to install solar panels, roof vents, or other equipment, while the bolt-on rails fit OEM holes for easy installation without drilling. Ideal for users seeking a professional, high-load roof rack with flexible layout options.
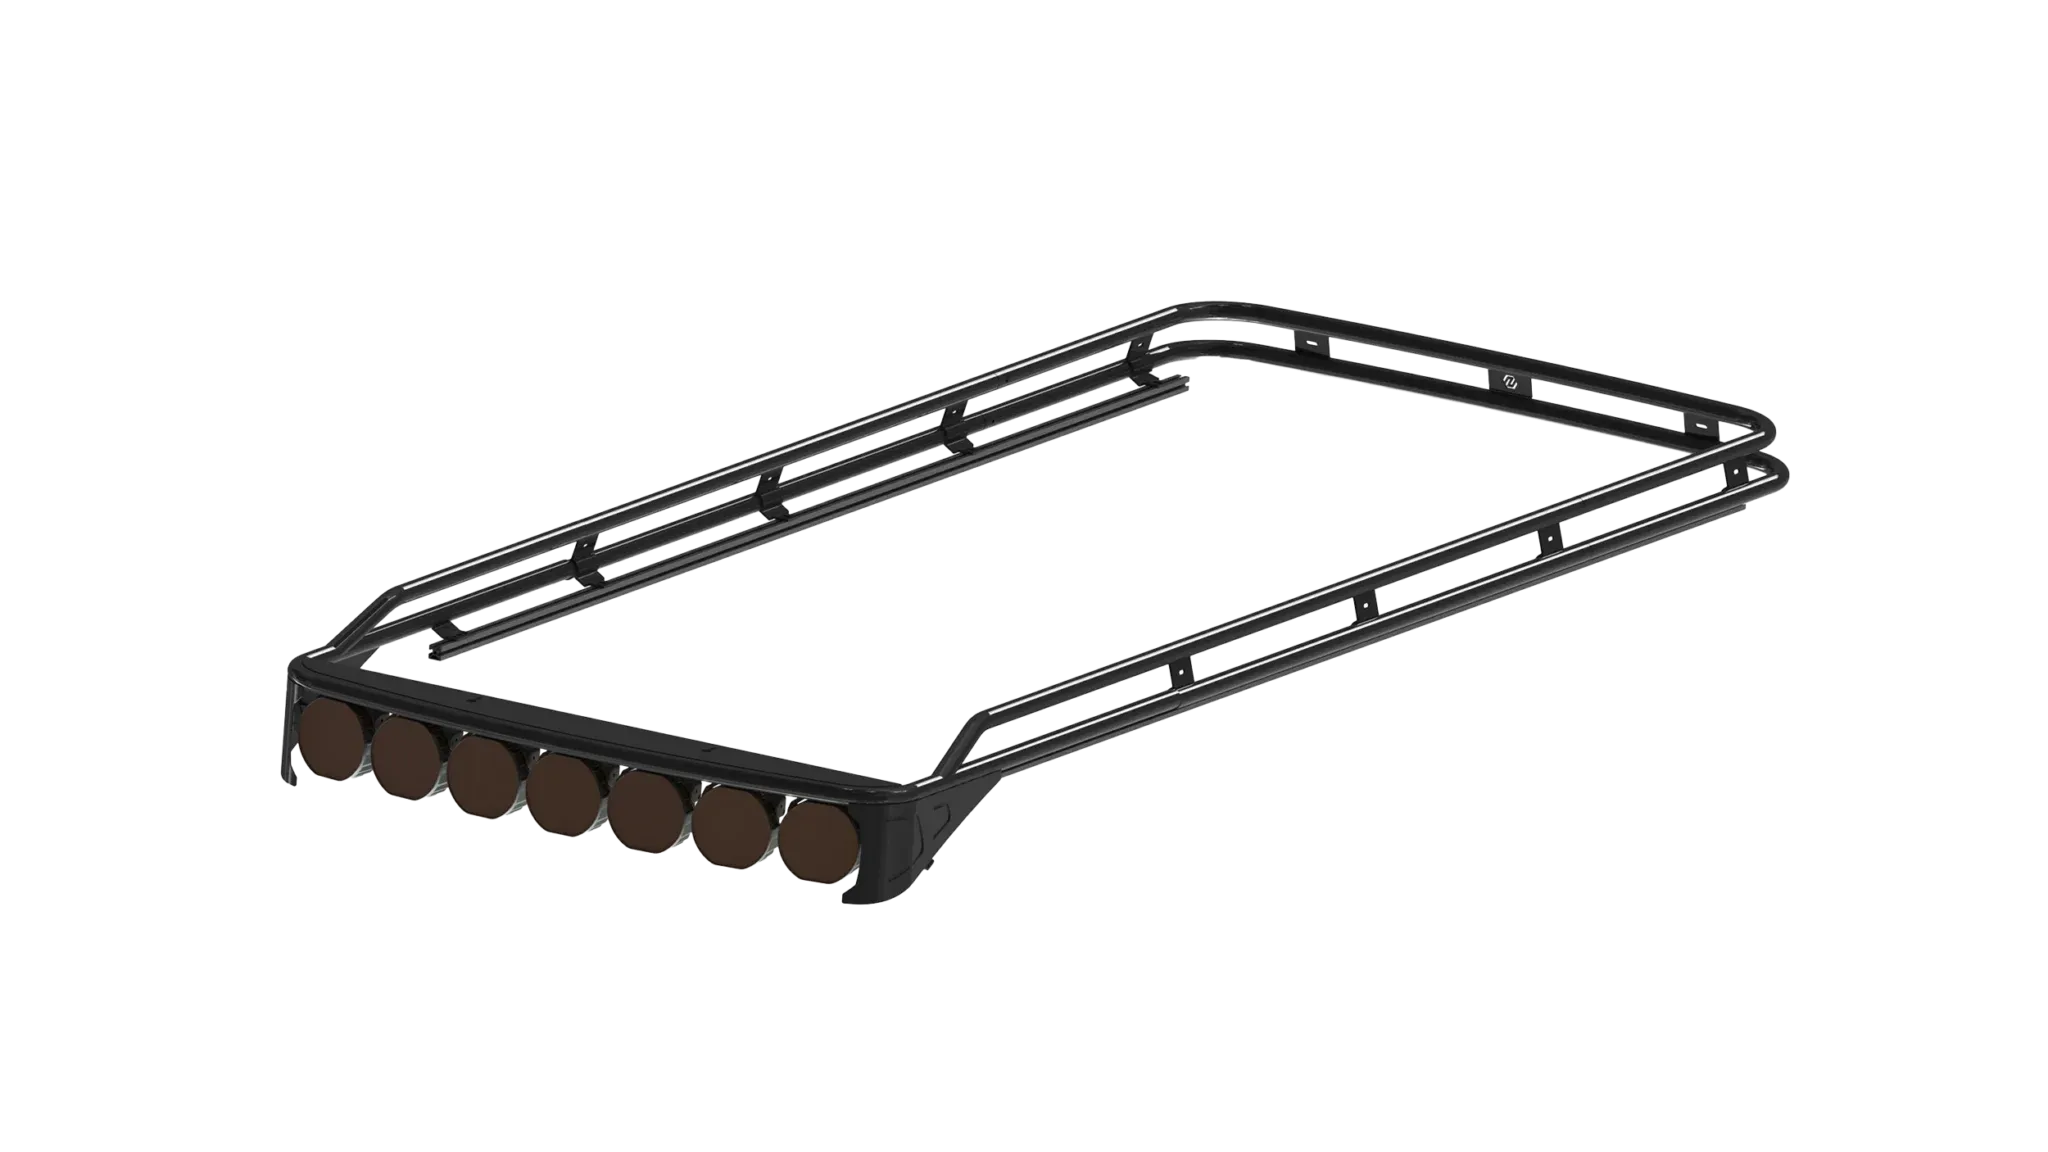
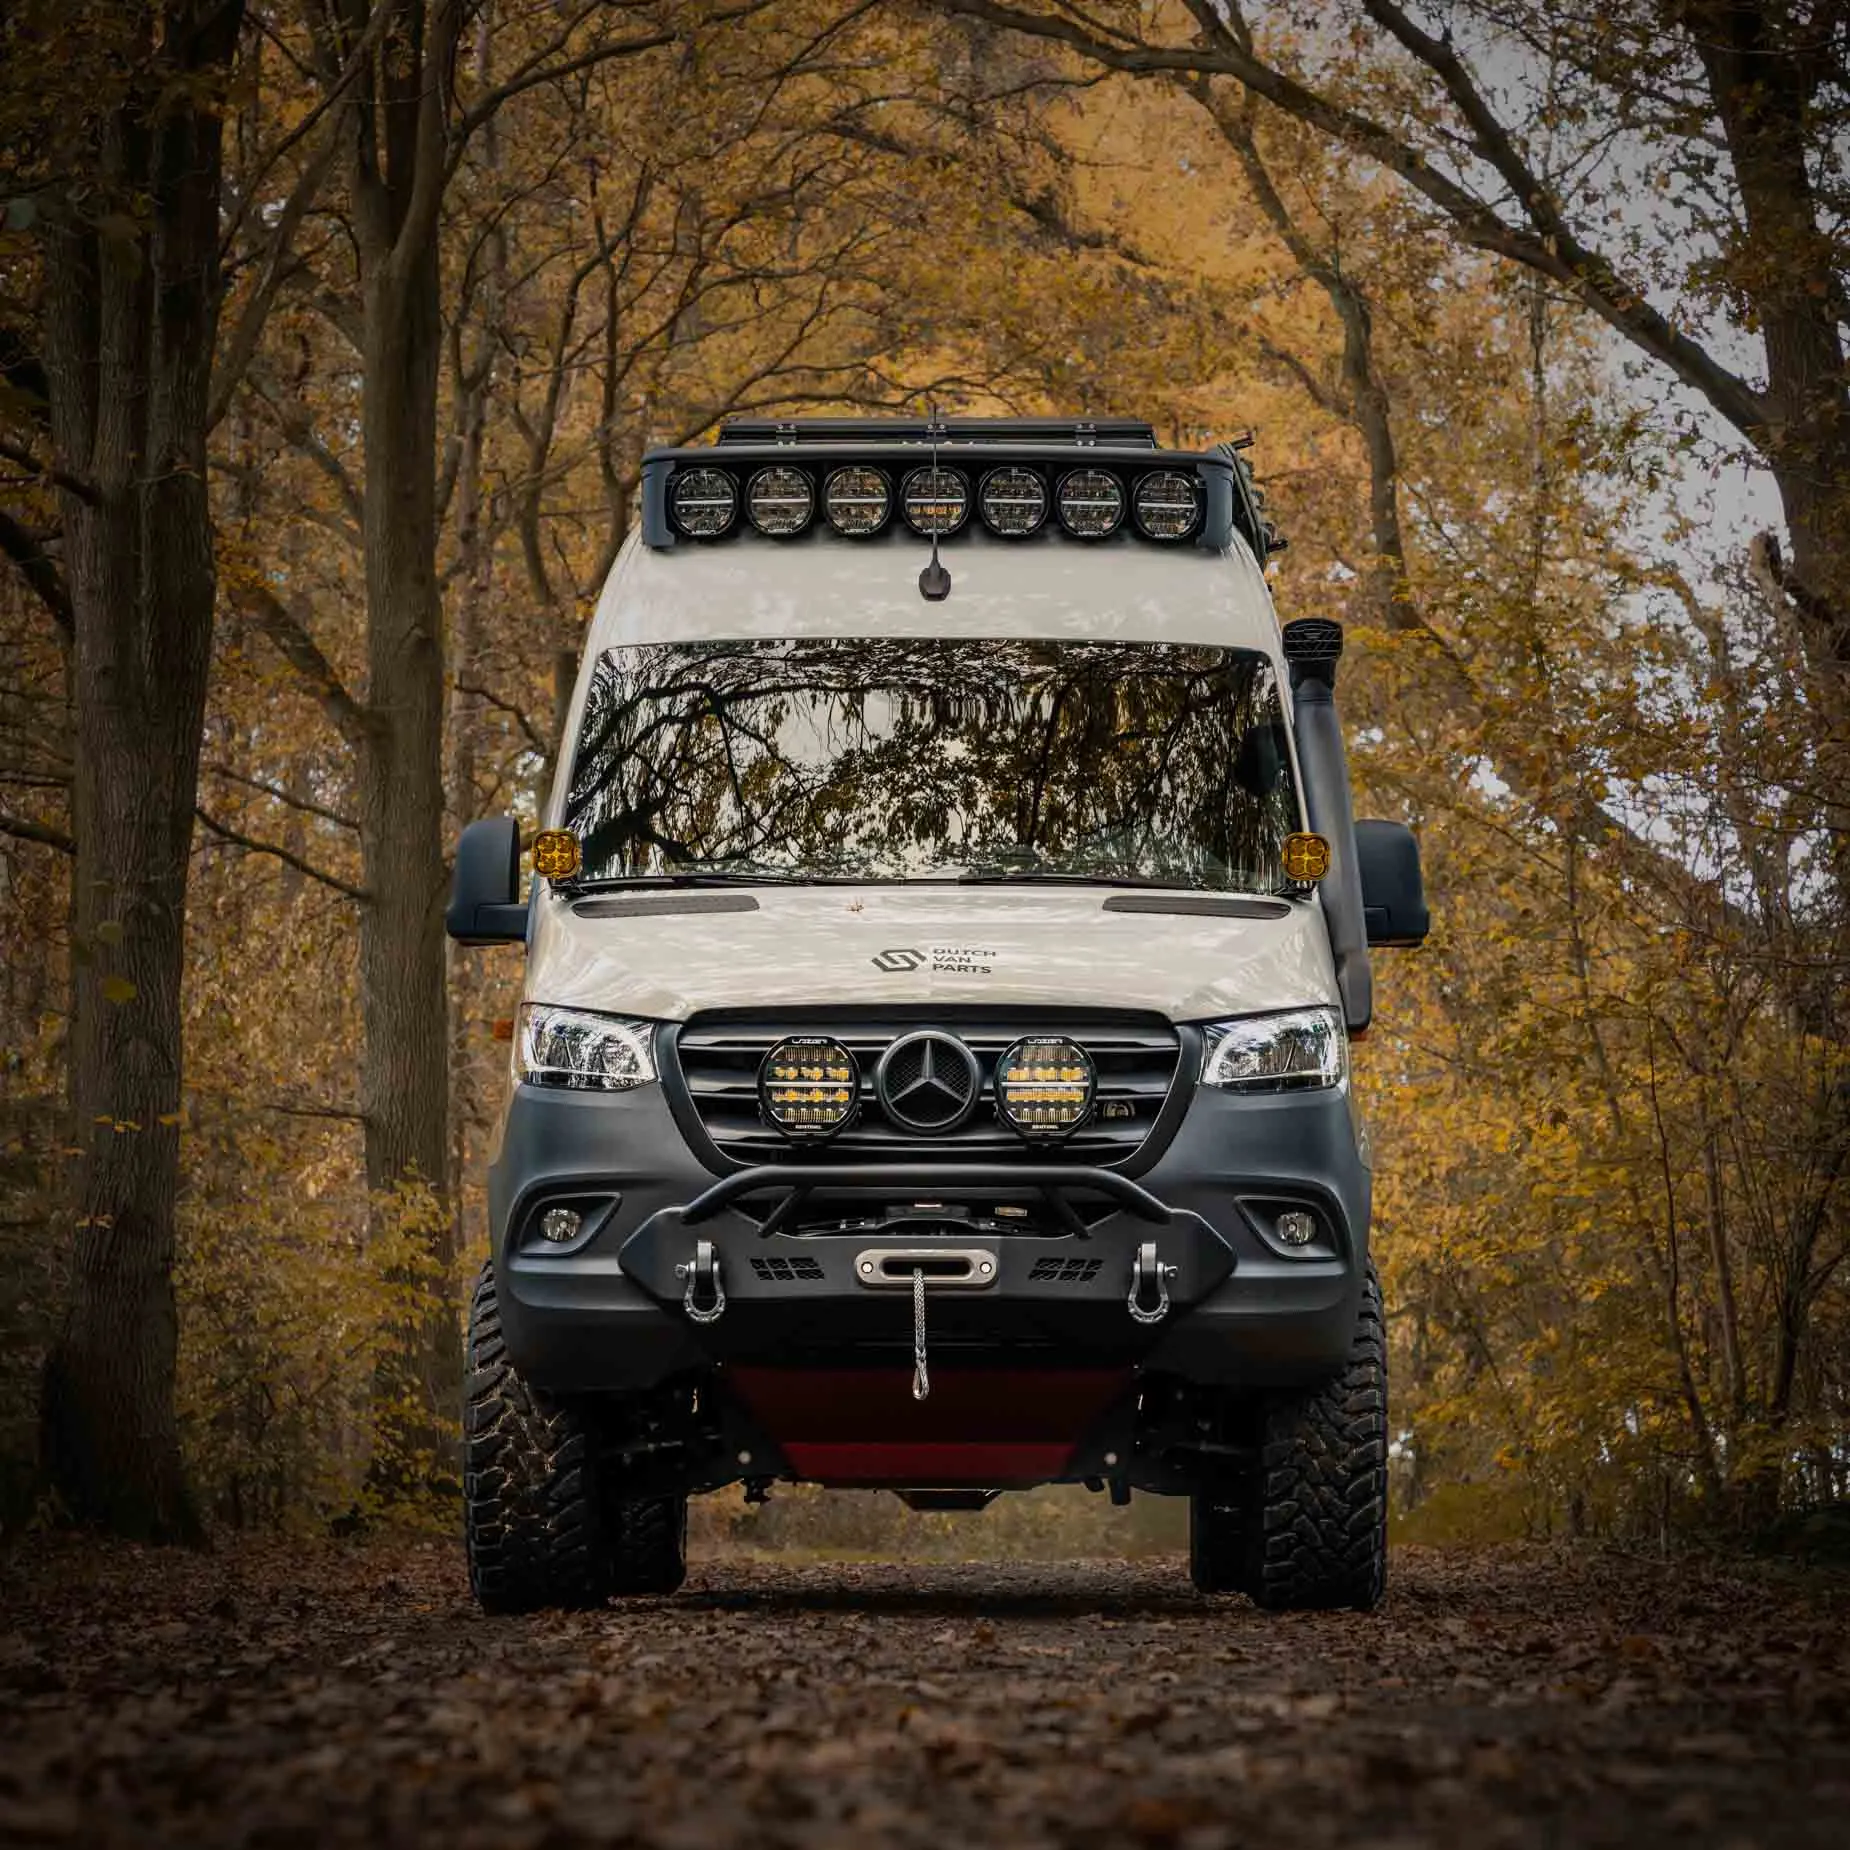
The Camp 3 Roof Rack
The Camp 3 Roof Rack is designed for maximum lighting performance, accommodating seven Lazer Sentinel 7” Elite lamps on its front section, while maintaining a seamless fit to your H2 Sprinter. Its modular floor decking system lets you customize the roof for solar panels, vents, or other equipment, and the bolt-on rails allow easy installation without drilling. Perfect for users who want full lighting capability and total accessory flexibility.
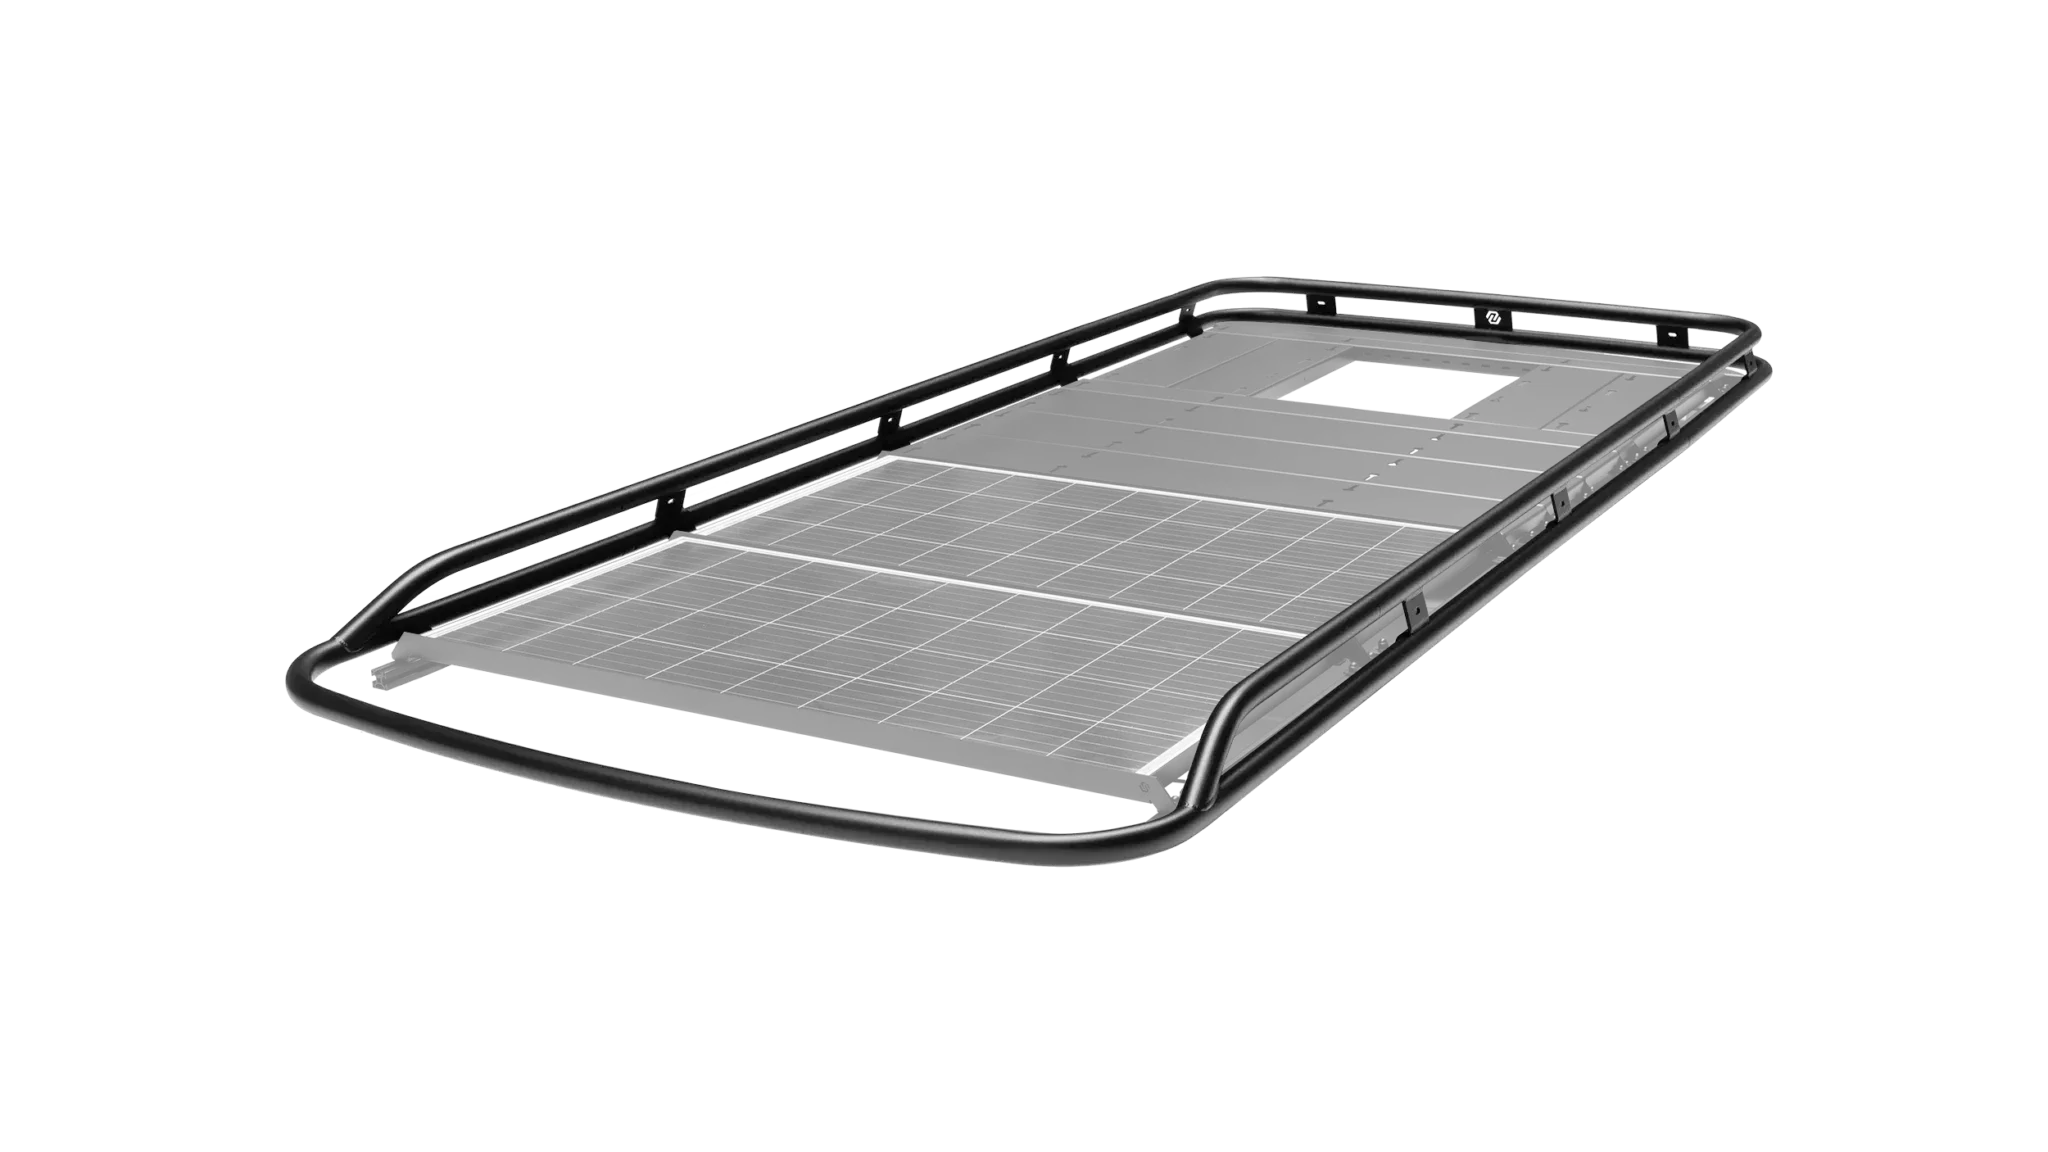
Configuring Your Floor Decking
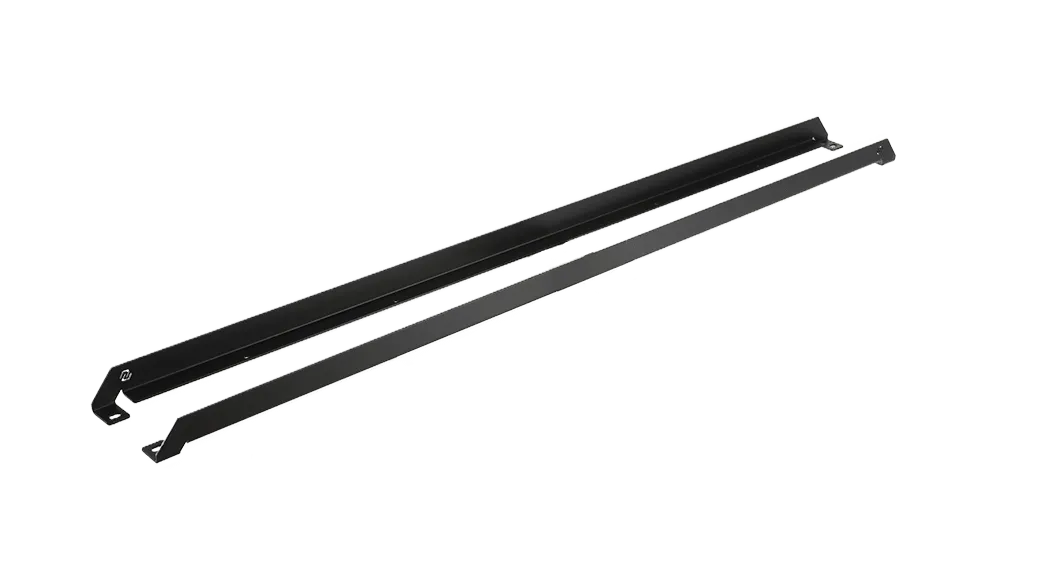
Understanding the Roof Rails system
The space on your roof rack is fully customizable to your needs. Below is a clear guide to help you configure your setup.
First, it’s important to understand the length of the roof rails and the two mounting points at the front. These points allow you to mount a solar panel at the very front of the rack, even where there is no rail. Along the rest of the rail, you can add floor decking exactly as you prefer.
In the image, you can see two variable dimensions:
| Model | A (L2H2) | A (L3H2) | A (L4H2) | B |
|---|---|---|---|---|
| Basecamp | 3000 mm | 4100 mm | 4500 mm | No mounting points |
| Camp 2 | 3000 mm | 4100 mm | 4500 mm | 350 mm |
| Camp 3 | 3000 mm | 4100 mm | 4500 mm | 500 mm |

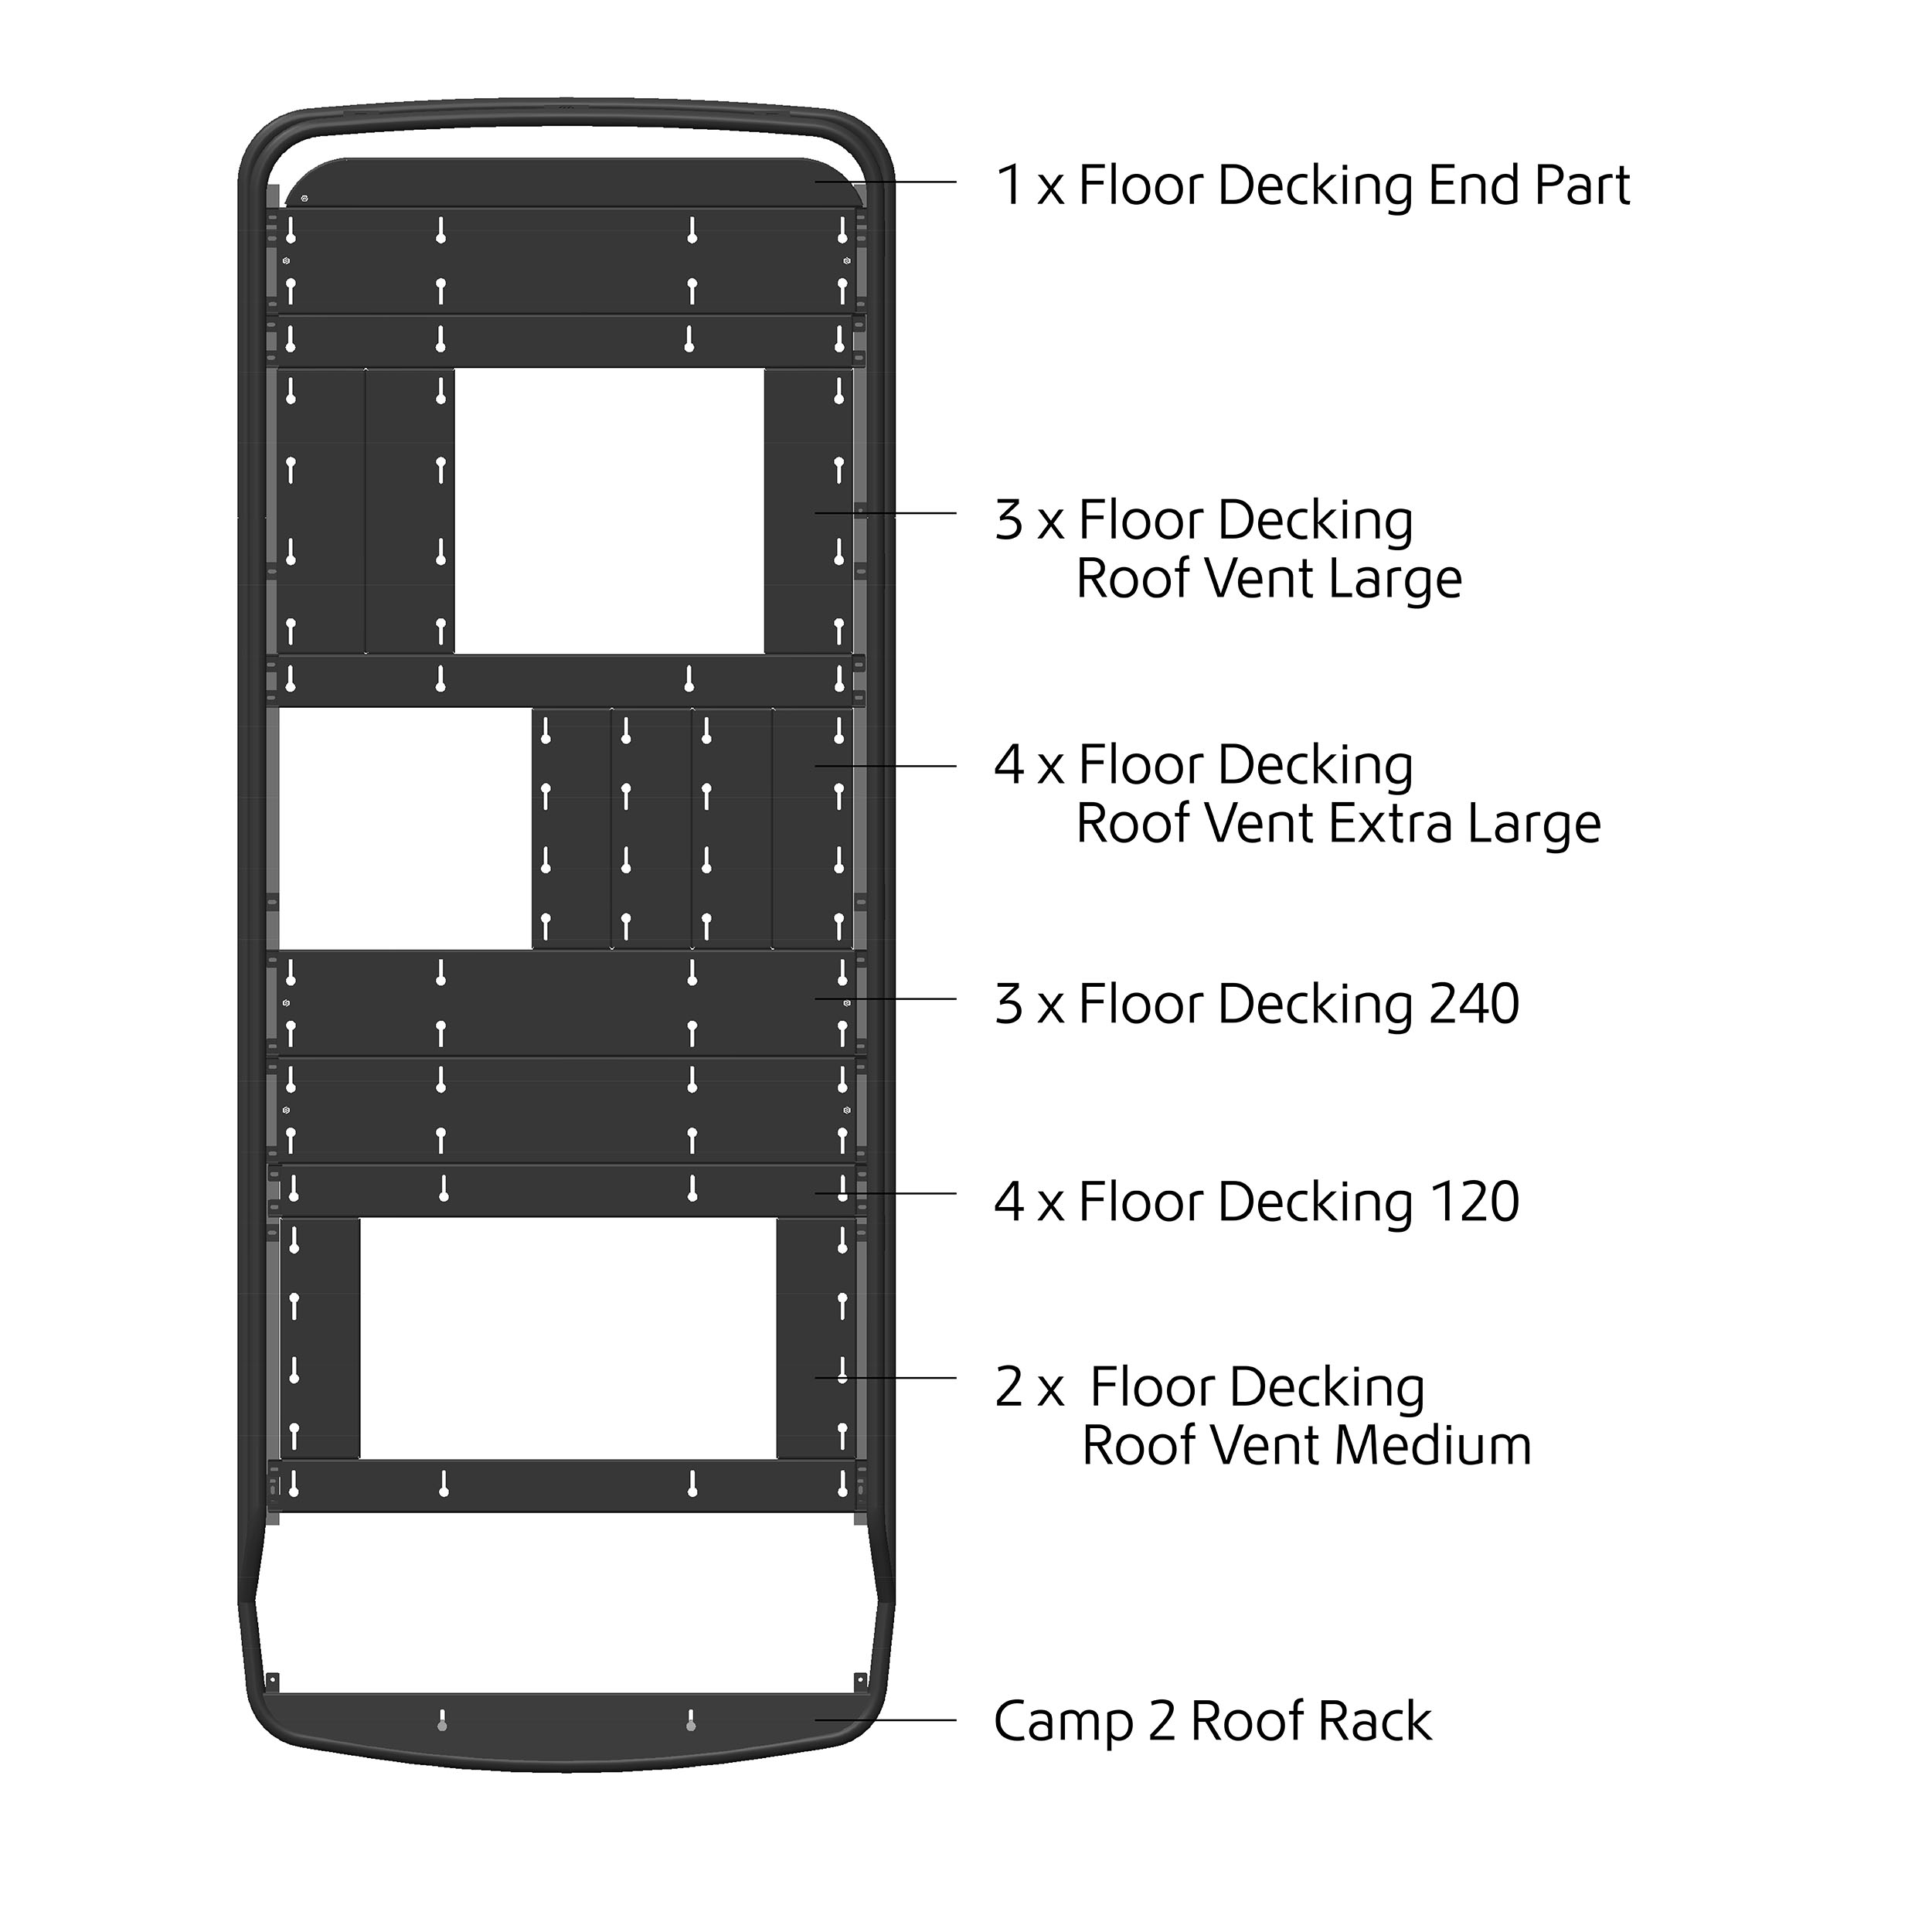
Understanding the Floor Decking and Its Possibilities
Floor decking provides a spacious and stable platform for walking, sitting, or securely mounting your essential gear.
To match the width of your Roof Rack, we offer two decking sizes:
Floor Decking 240: 1345 × 240 mm
Floor Decking 120: 1345 × 120 mm
These options give you complete flexibility to configure your roof layout. Combined with our floor decking pieces designed for roof vents, you can easily create gaps in the decking wherever needed.
These options give you complete flexibility to configure your roof layout. Combined with our floor decking pieces designed for roof vents, you can easily create gaps in the decking wherever needed.
Creating Gaps in Your Floor Decking for Roof Vents
To create the required gaps, there are three available sizes:
Floor Decking Roof Vent Medium: 540 × 180 mm
Floor Decking Roof Vent Large: 640 × 200 mm – designed to fit around the Maxxfan roof vent
Floor Decking Roof Vent Extra Large: 820 × 330 mm
These panels are not mounted to the roof rails, but instead attach to the surrounding floor decking.
The image shows an example configuration using all three roof vent sizes. By combining the Floor Decking 120 / 240 panels with the Floor Decking Roof Vent options, you can create the gaps that best suit your van’s layout.
Floor Decking End Part
For a polished finish, you can add a floor decking end part. This piece mounts to the last section of your floor decking, giving your fully equipped roof rack a clean, professional look.
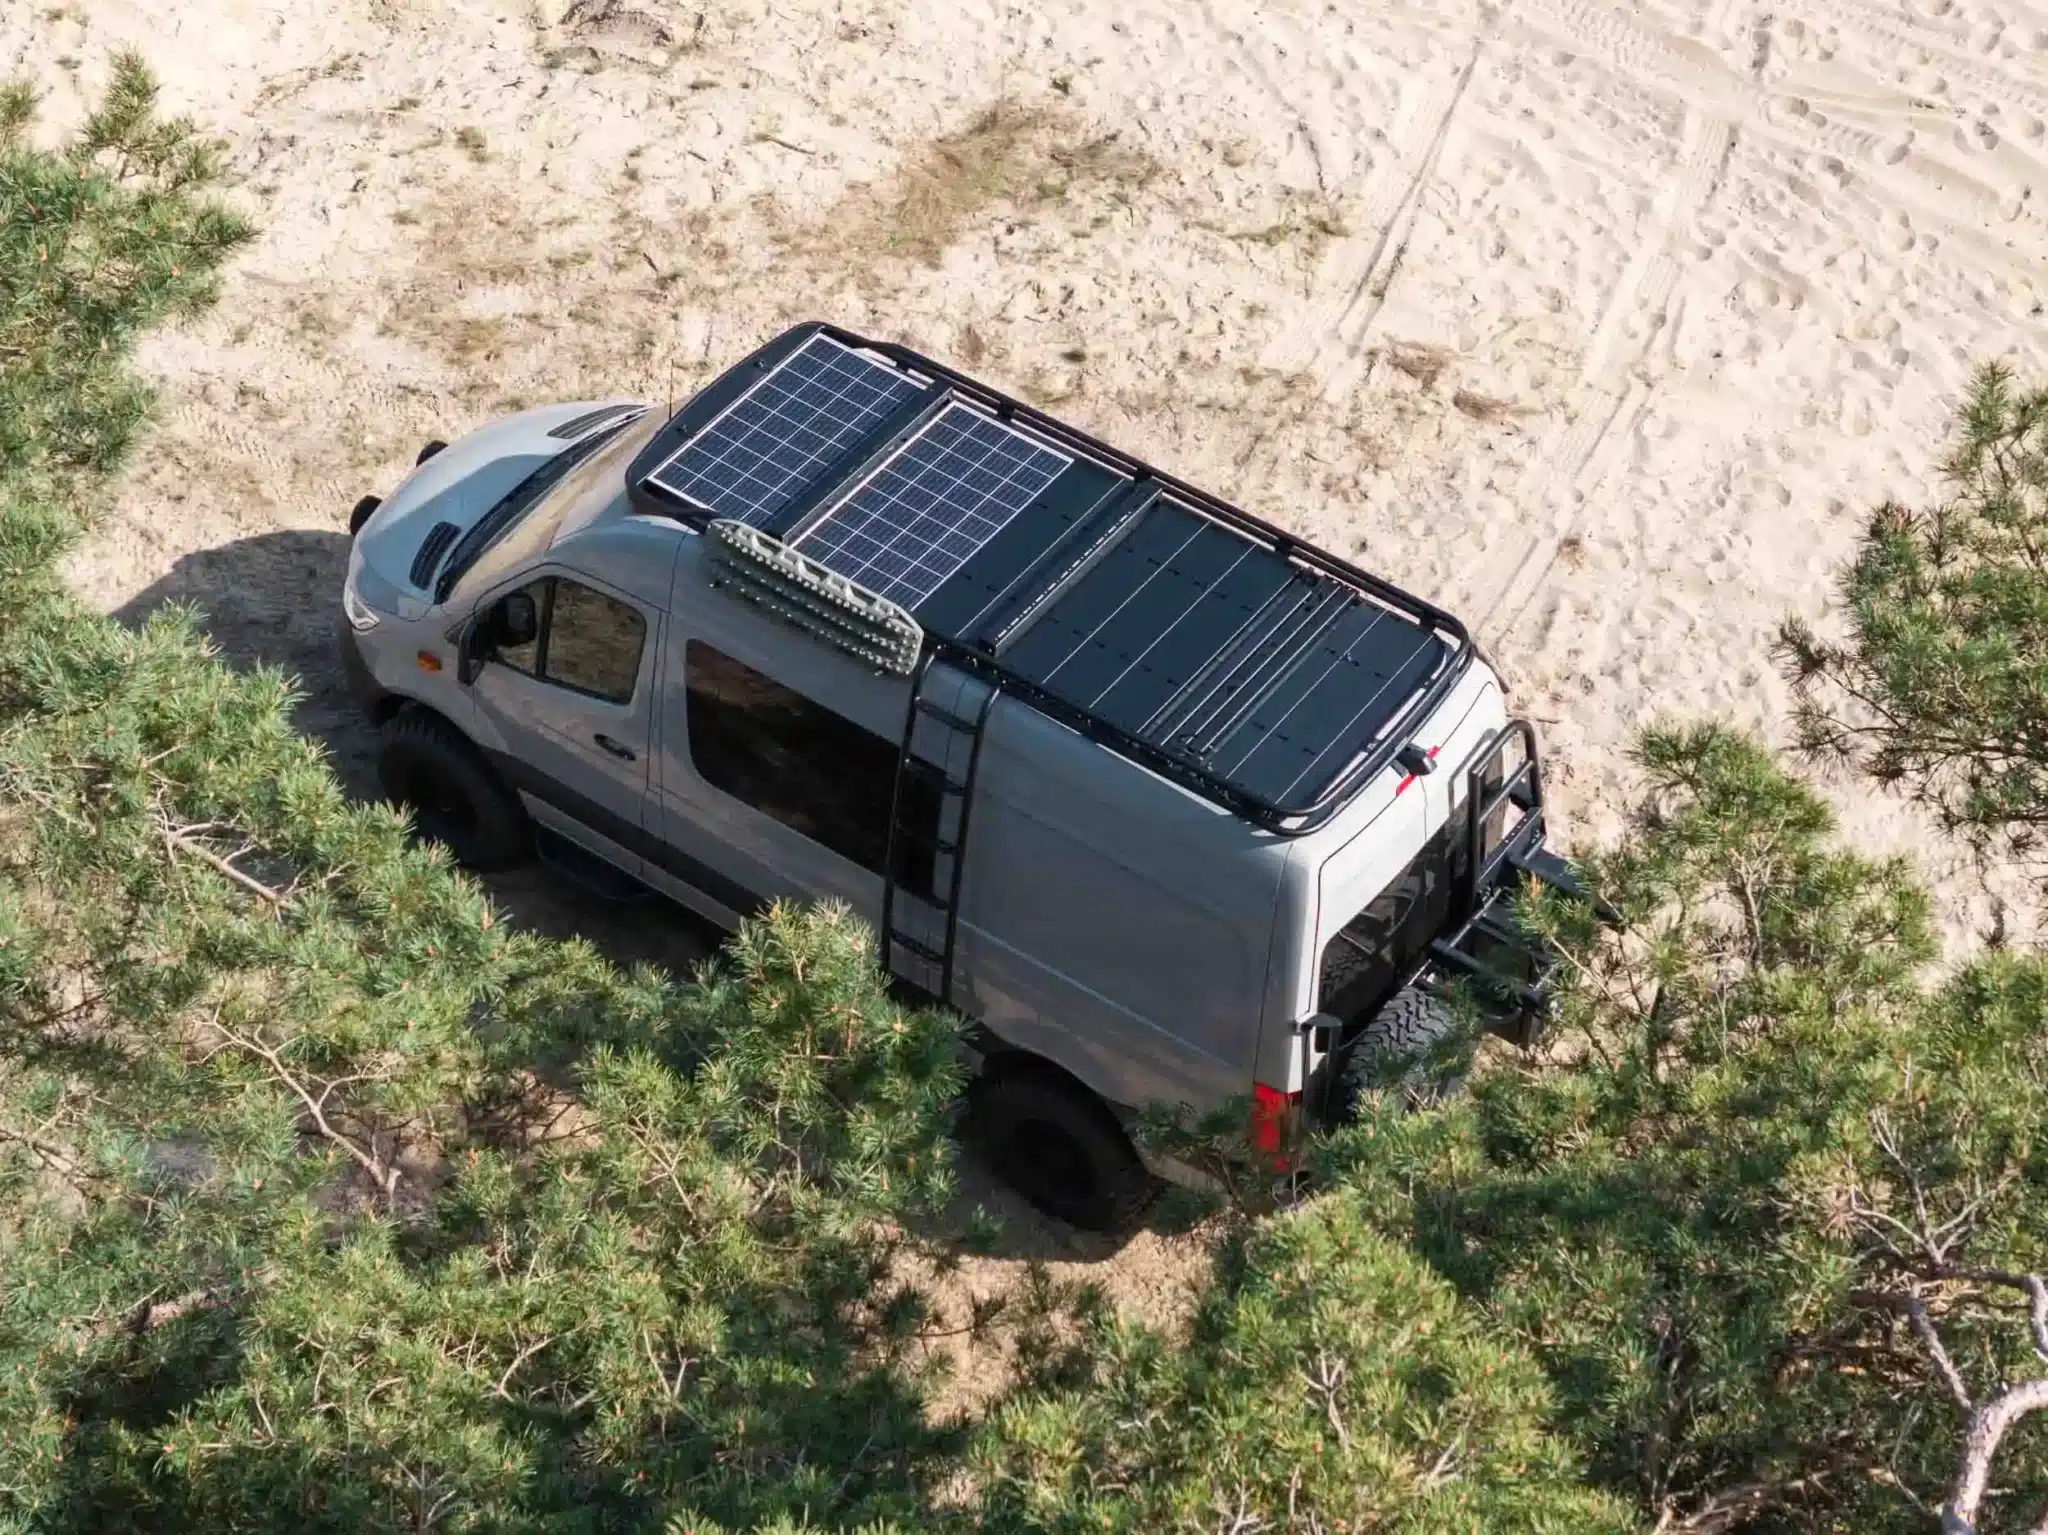
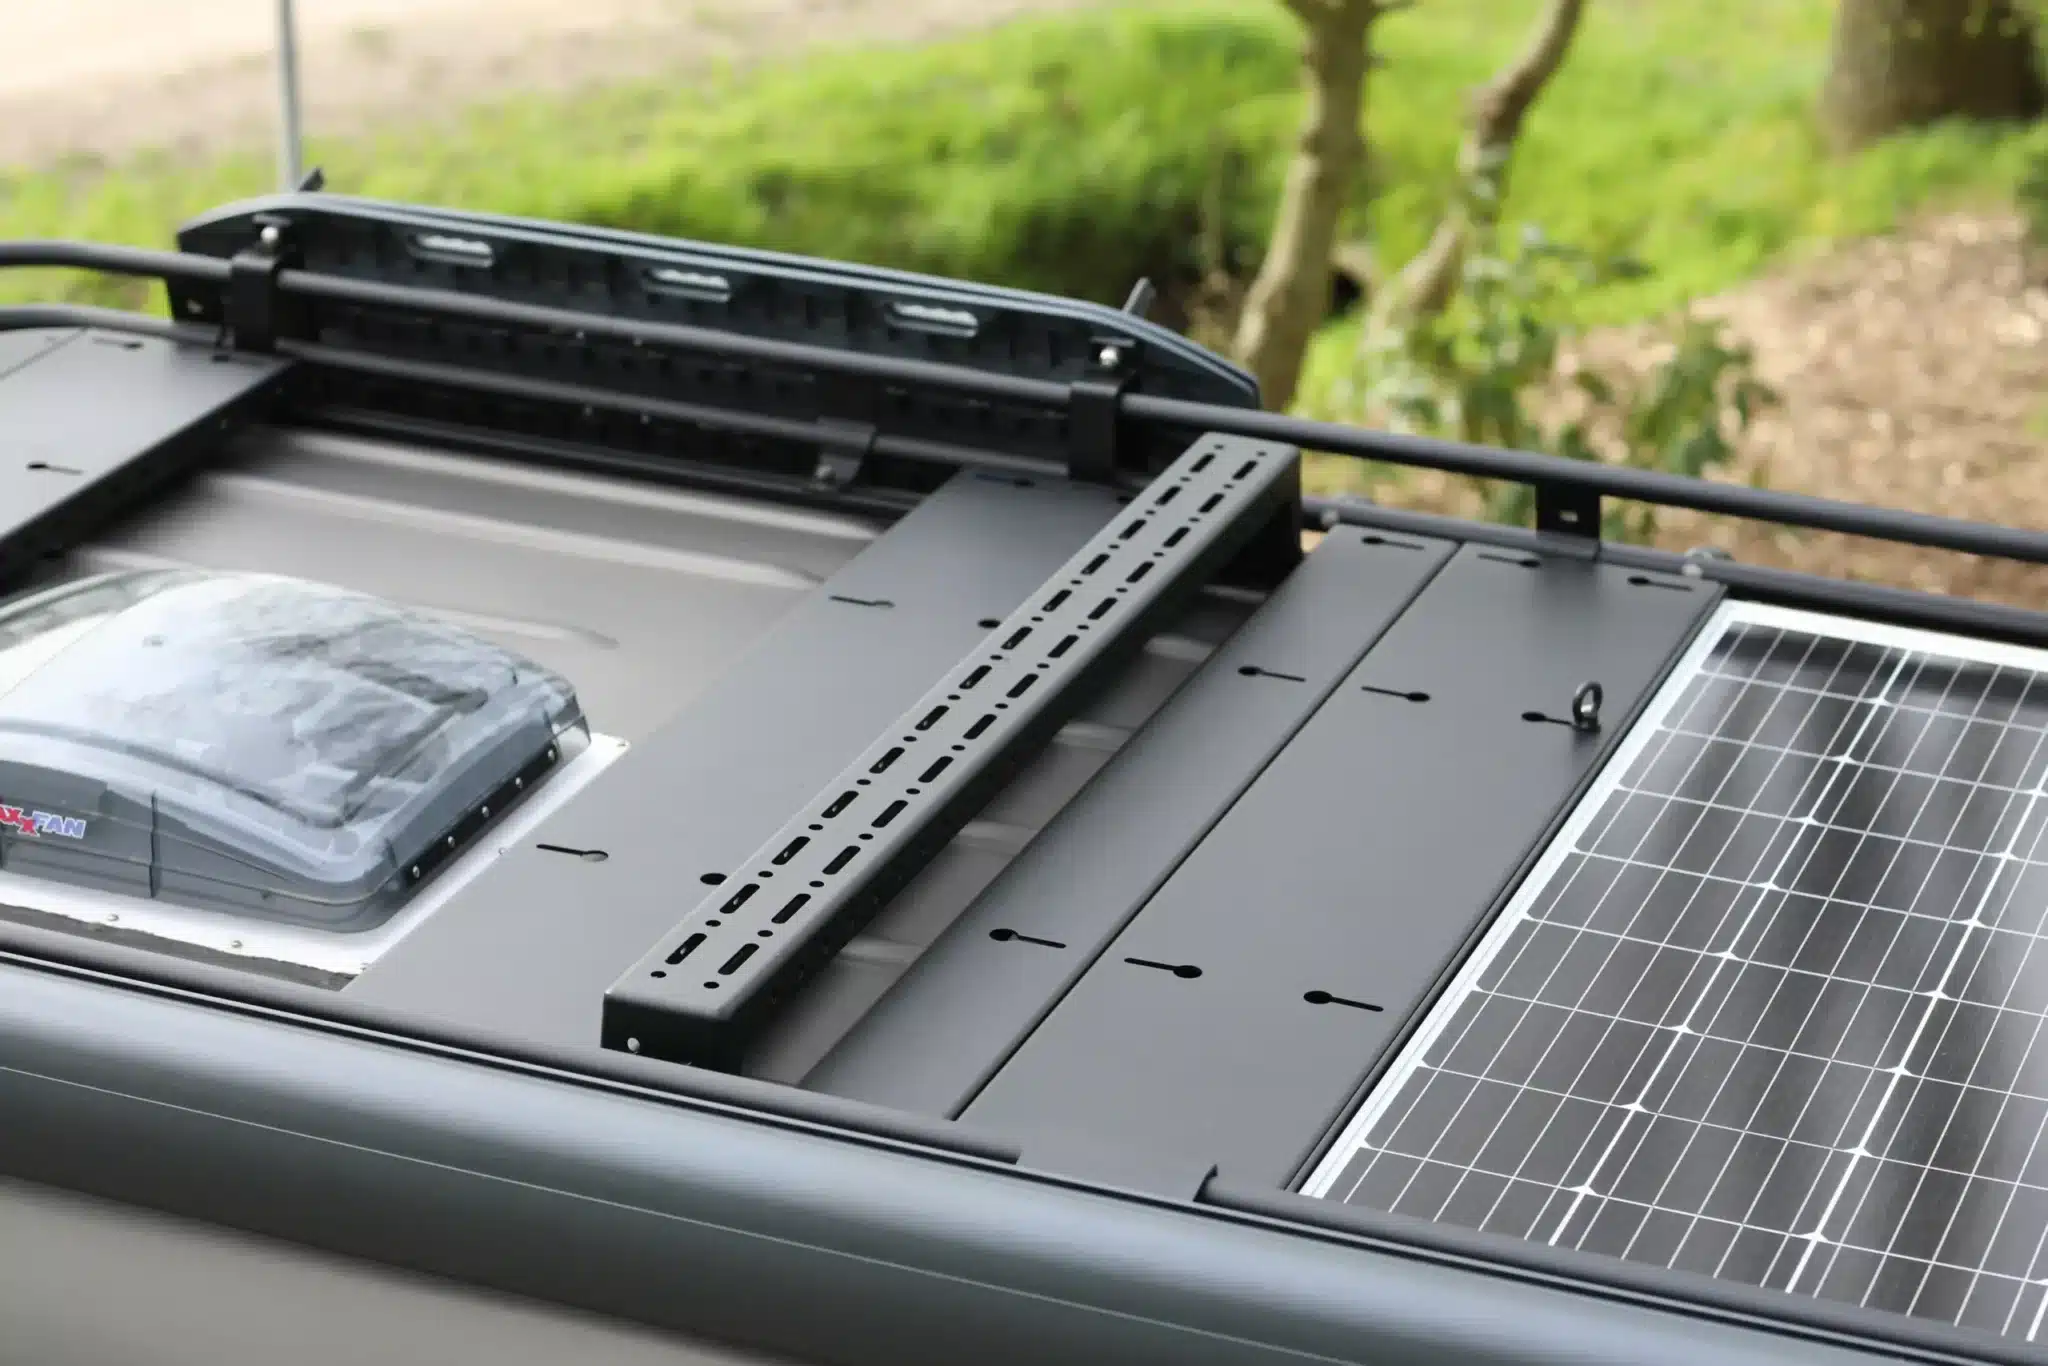
Mounting Solar Panels
As mentioned earlier, you can mount one solar panel at the very front of the roof rack. Mounting solar panels is done using our Solar Panel Profile Set, which provides a no-drill solution.
You can install the solar panels either across the width or along the length of the van. For optimal support, we recommend mounting them across the width. However, mounting them lengthwise is also possible, especially for shorter panels. This setup allows you to place two or even three solar panels side-by-side along the length of the van, secured within the Solar Panel Profile Set.
For Mercedes Sprinter and Volkswagen Crafter (2006–2017) campervans, the total width of a solar panel cannot exceed 1285 mm.
Currently we have these Solar Panels:
Solar Panel 200W Schadowflux Anti-Shading N-Type → Dimensions: 1262 × 764 × 30 mm
Solar Panel 120W Schadowfluw Anti-Shading N-Type → Dimensions: 1052 × 578 × 30 mm
Ironman 4×4 210W Solar Panel → Dimensions: 1185 × 880 × 30 mm
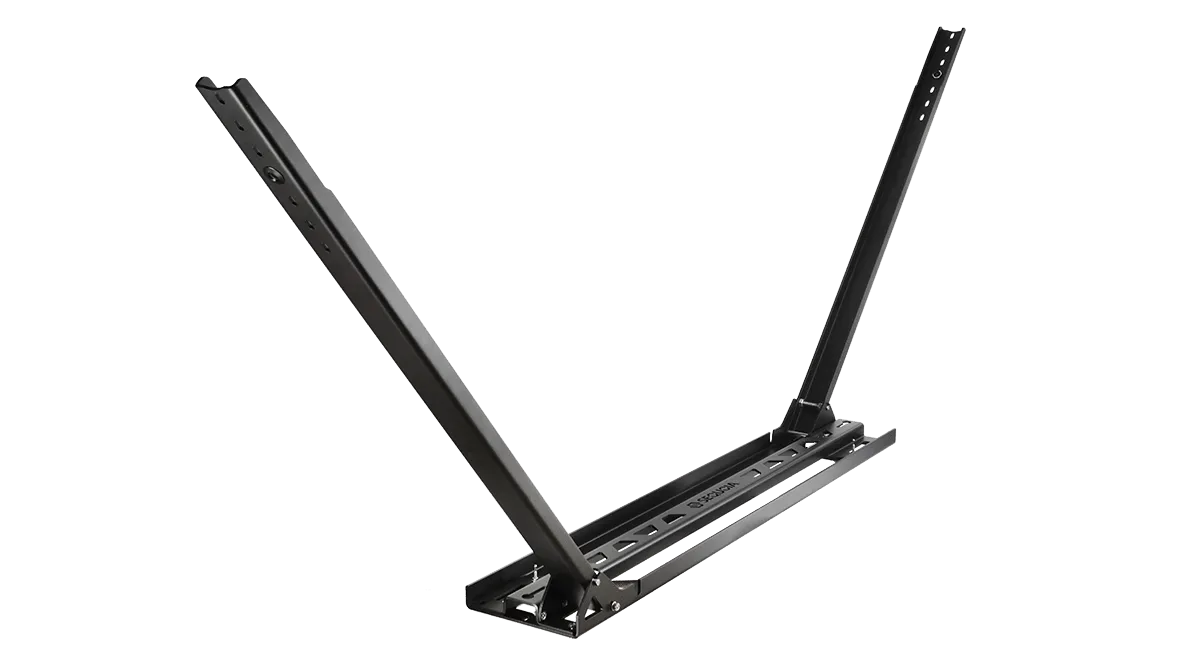
Adding a Cross Beam
If you plan to carry bulky equipment and need to position it over roof vents, you can add a cross beam to your setup. The cross beam creates an elevated platform above the rest of the floor decking. Its top surface aligns with the top tube of the roof rack, ensuring a level mounting surface.
Adding a Roof Tent
If you need additional sleeping space, you can add one of our roof tents. Optional brackets are available to mount the tent directly to the rail, allowing you to position it as close to the roof as possible.
Both the CUMARU LIGHT 127 and LT-50 Weekender are excellent choices for campervan adventures because they fit nicely within our roof rack system. Their compact designs and quick setup make them practical for outdoor trips, providing comfortable sleeping space and convenient features while fitting securely on top of your vehicle.
Adding a Hammock Frame
In addition to the 120 and 240 mm floor decking, there is another width option: the hammock frame. When installed, it provides the highest hammock position in the campground. It is the same height as the other floor decking, allowing it to blend seamlessly with the rest of your roof setup.
Finishing the Roof Rack
Now that you’ve configured the floor decking, it’s time to complete your roof rack setup.
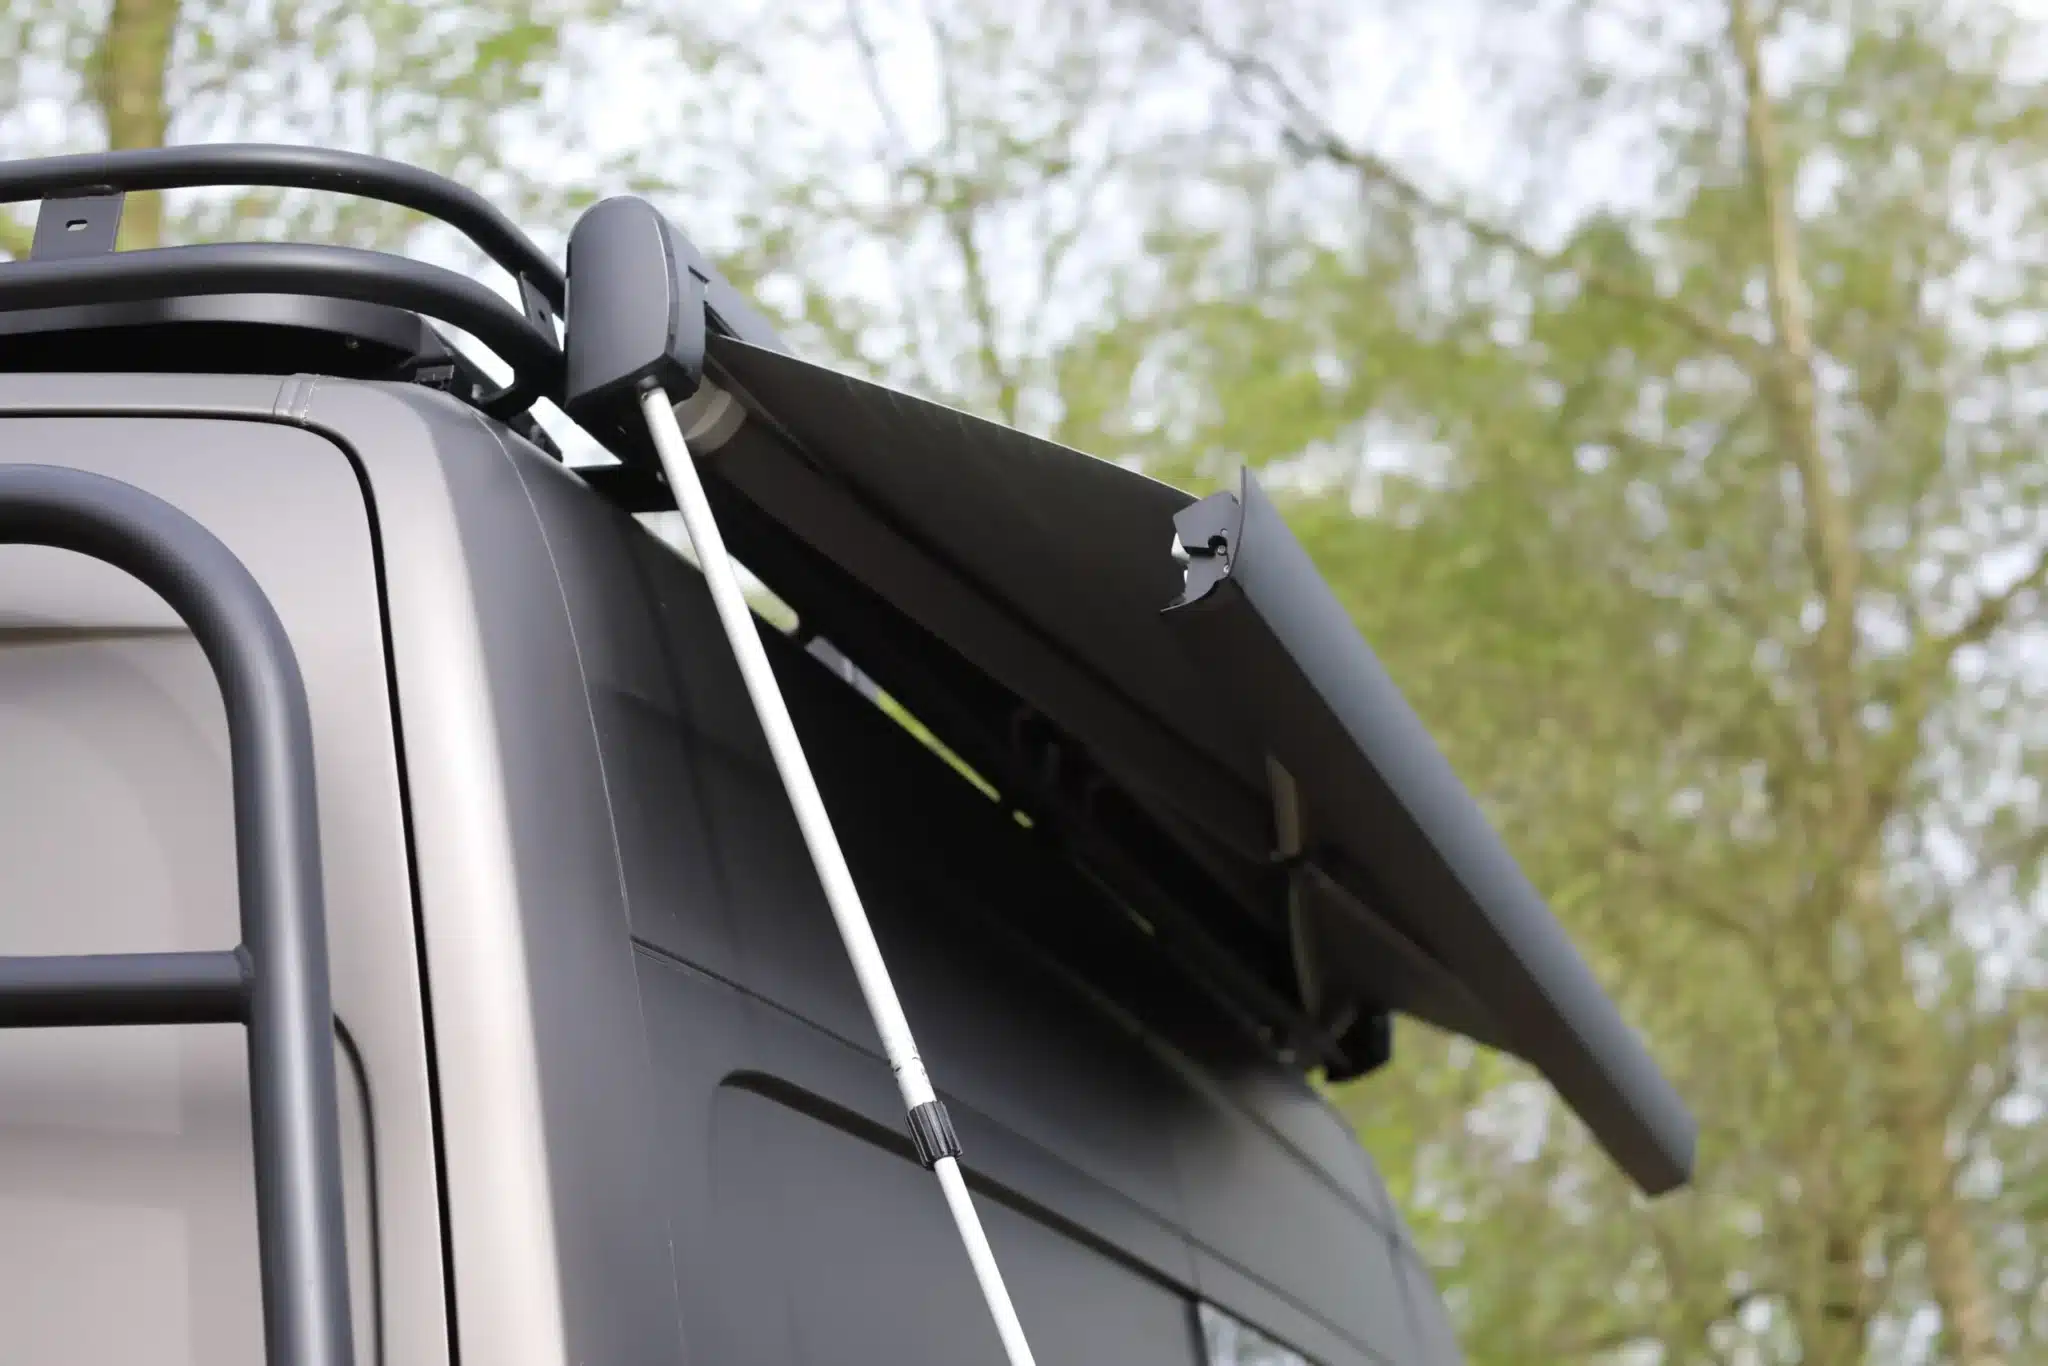
Adding an Awning
The Awning Brackets allow you to mount a wall-mounted awning to the side of your roof rack. They are specifically designed for wall-mounted awnings, such as the Thule Omnistor 5200 and Fiamma F45s, and do not support roof-mounted awnings.
Installation requires the Sequoia roof rails and roof rack tube loop. Each Awning Brackets Set includes three brackets, sufficient for mounting one awning. The price shown covers one set.
Choose the awning length based on your van’s dimensions. For the best appearance, select an awning that does not extend beyond the rear compartment. You can also add the awning and brackets at any stage of your build.
Recommended Awning Sizes for Volkswagen Crafter (2006–2017) and Mercedes Sprinter:
L2: ~300 cm
L3: ~400 cm
L4: 400–430 cm
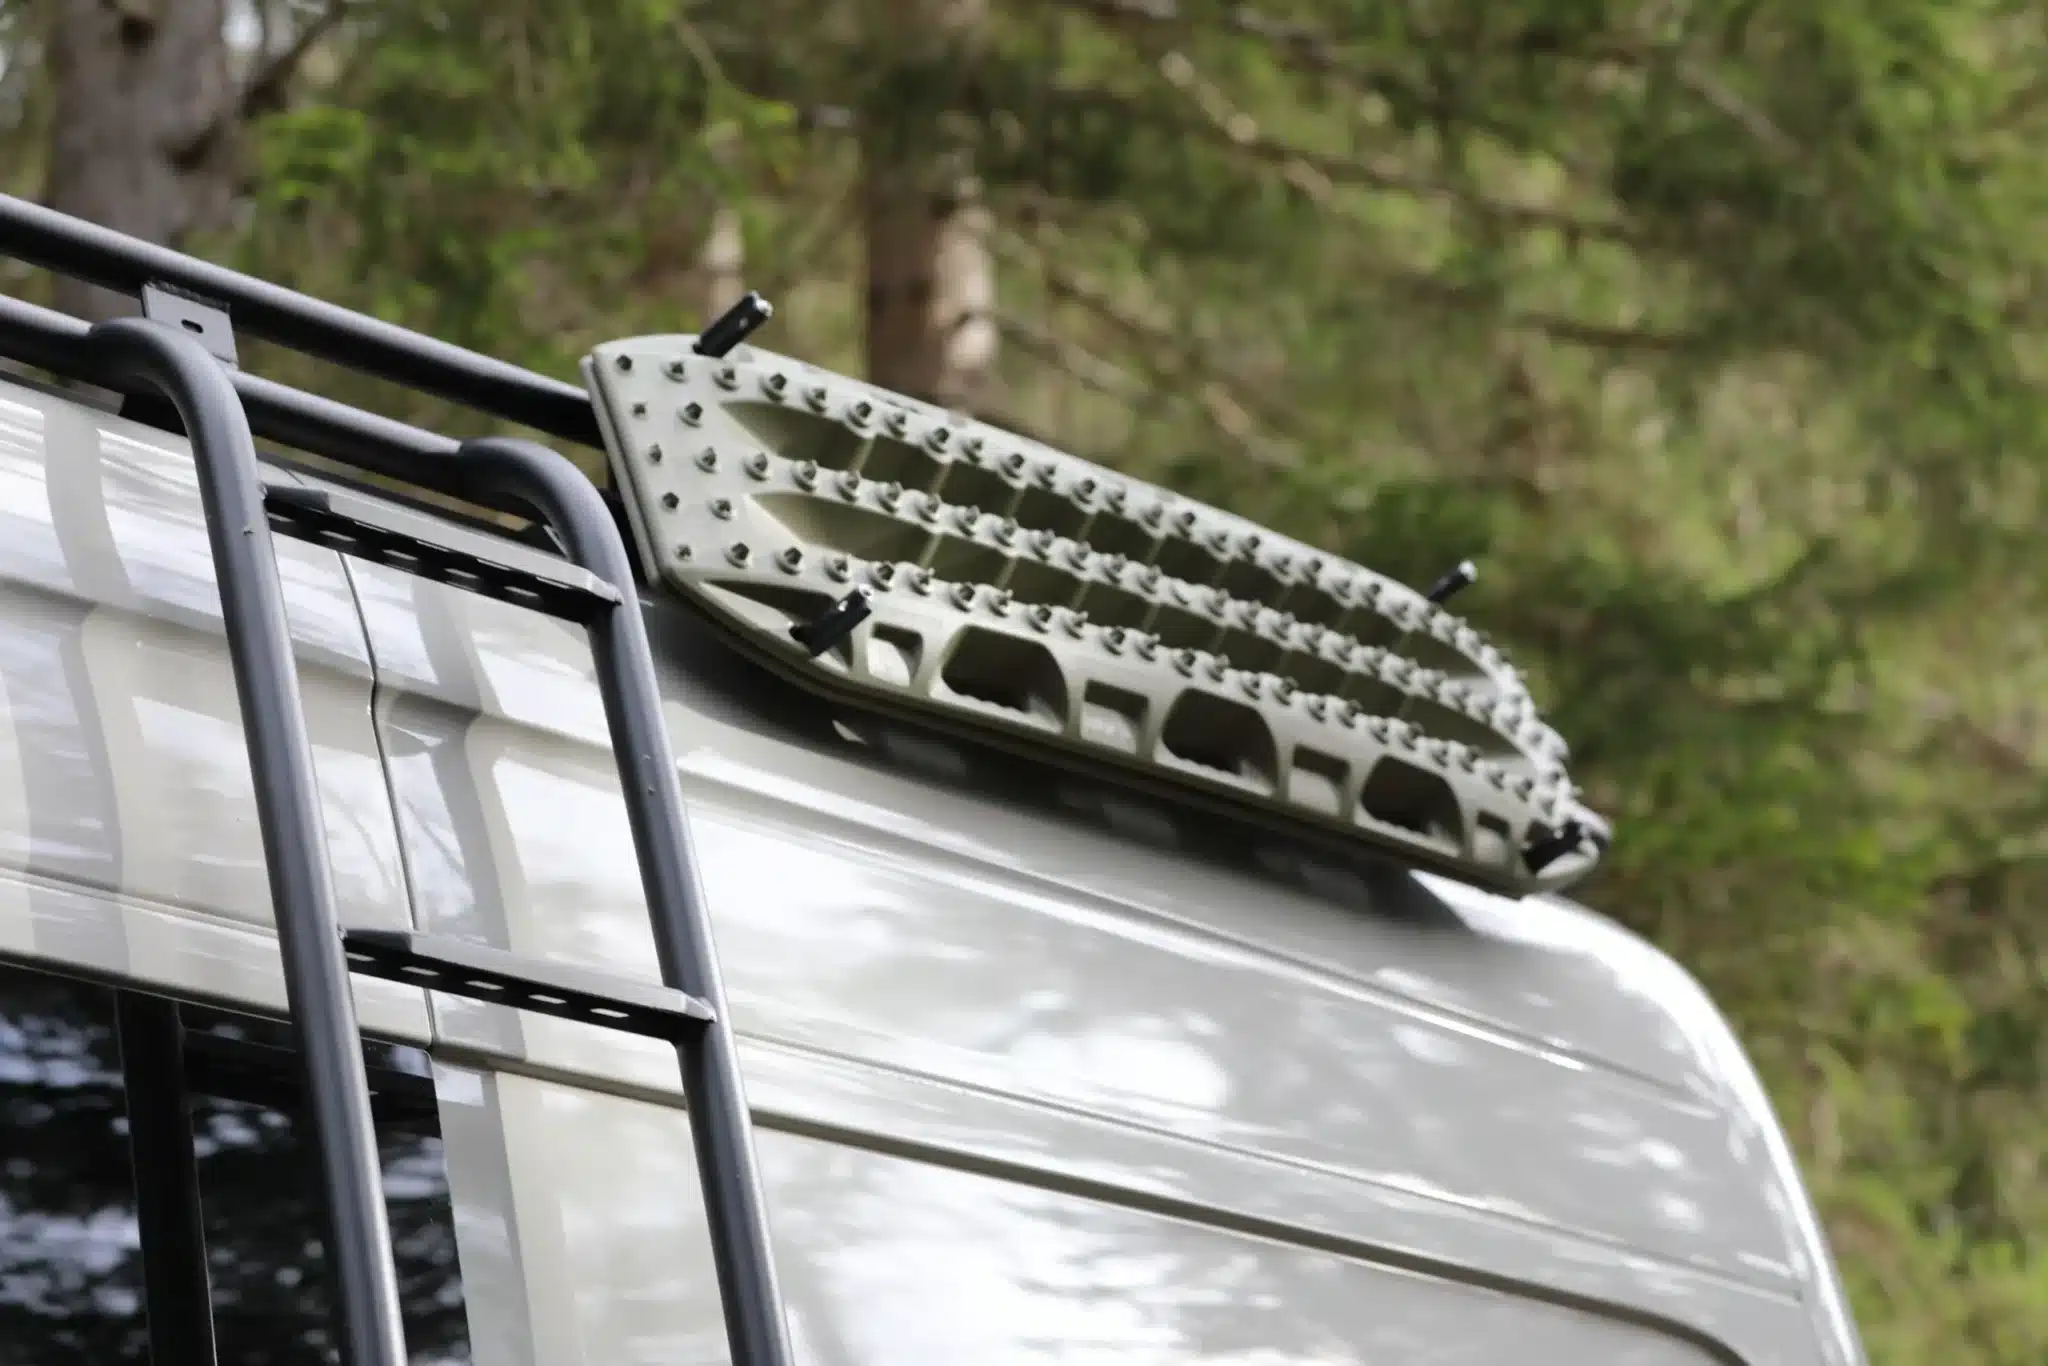
Bringing Maxtrax Recovery Boards?
The Maxtrax Recovery Board Brackets offer flexible mounting along the full length of your Sprinter roof rack, on both the left and right sides. They attach to the roof rails, not the exterior of the van.
Compatible with:
Maxtrax Mini
Maxtrax Lite
Maxtrax MKII
Maxtrax Xtreme
Camp 3